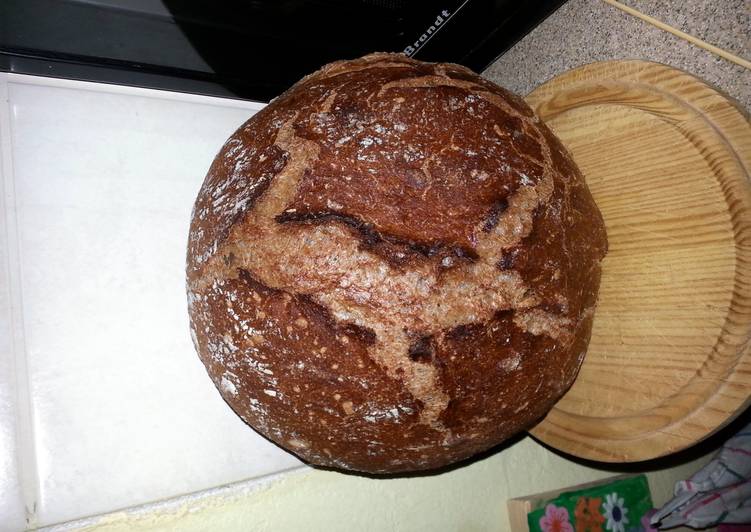
Best of 40% whole wheat bread. online.
 You do ones thing brewing reduce 40% whole wheat bread. testing 6 prescription also 8 steps. Here you are make it.
program of 40% whole wheat bread.
- You need 200 grams of Whole wheat flour..
- give 300 grams of White wheat flour..
- also 400 grams of Water 90-95°F (32-35°C).
- Prepare 1 bunch of Optional ingredients (seeds, bran, flakes etc).
- then 2 1/2 grams of Instant yeast (dry)..
- This 12 grams of Fine sea salt..
40% whole wheat bread. step by step
- Autolyse. Mix flours with lukewarm water, to the point of fully incorporated & no longer dry flour is visible. Cover and let it sit in room temperature, for 20-30min..
- Mixing. Prepare other bowl with warm water (that's for reweting your hand). Sprinkle salt, yeast and/or optional ingredients. Grab the dough from the bottom and fold on the top. Repeat it 4-5 times. Use your thumb & forefinger to 'pince' the dough inbetween folds. Rewet hand when needed..
- Folding. Set the timer for 5 hrs. It's best to fold the dough 3-4 times, during first 2 hrs of fermentation (for ex. every half hour). Grab from the bottom, stretch but not too much, and fold over the top. This step doesn't require 'pinching'. Only 3-4 folds at a time. That serves for building 'structure/foundation' for gluten. By the 3 or 4 fold you'll notice that dough has stiffened and has some gas (CO2) inside. That's good :).
- Dividing. That's an optional step. Follow it only when you have enough dough for 2 or more loafs (this recipe can be scaled up if you have bigger family :)) Sprinkle some flour on your working surface, flour your hands to easily handle the dough. Tip it on the surface, and divide on equal parts, using plastic scraper or dough knife..
- Shaping & proofing. By the end of those 5 hrs, dough at least should double (or even triple) its original volume. Shape the dough in way that seams will be facing the bottom. Sprinkle some flour on the top, cover and let it proof for approx. 60-75 min (it depends of your ambient temperature, if warmer - shorter proofing time would be needed). Finger dent test after 1 hr. If dough after poking springs back quickly = some more time is needed. If springs back slowly and not completely = fully proofed and ready for baking. If doesn't spring back = over proofed (but good to go as well :)).
- Preheating. Before end of proofing time (15-20 min), set your oven for 475°F (245°C). Put inside the dutch oven or other heat resistant vessel with lid on..
- Baking. Using antiheat mitts, take out dutch oven & lid off. Very gently and carefully (heat!!! ) transfer your prooven dough to the dutch oven (using edges of your palms, not fingers). Cover and bake in the middle of the oven for 30 min, maintaining 475°F (245°C). After that time, take the lid off and bake for another approx. 15-20 min (it's a crust formation phase)..
- After bake is done. Again, wearing mitts, take the loaf out and let it cool on some rack or even tilted on one side (better air circulation around). It's cooled enough after 20 min. Enjoy fruit of you labor :).